
This was one of our more unusual plans for the craft room furniture. I knew I wanted a Kallax wall, with lots of cubbies full of crafty goodies. You’ve already seen the posts about the Creations by Rod units, designed especially for Kallax units from Ikea. So armed with a trusty tape-measure and the Ikea online catalogue, I started working out the best way to achieve my dream.
Before any work started, I had measured the wall and worked out that I could fit in units that were 12 cubbies wide in total. Ikea sell Kallax in a variety of sizes, and the ones I was looking at were either 3×4, 4×4, or 5×5. I knew the one closest the door would be 3×4, as I wanted something waist(ish)-height on the way into the room to act as a display. But then I thought the 4x4s would be too short. I considered putting a 1×4 or even a 2×4 on top, but the thickness of the unit sides wasn’t exactly what I was looking for.
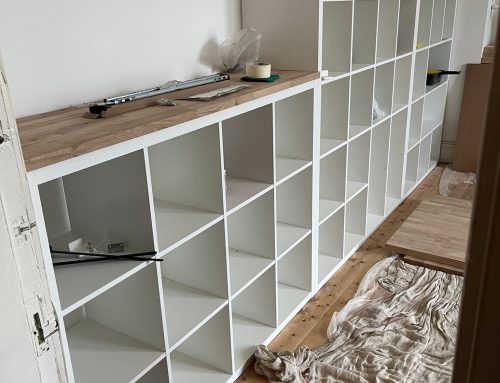
I turned to Tom for his opinion, and he had a great idea. And of course it needed an Excel spreadsheet! What is Ikea furniture if not adult Lego? And everyone knows that you can build Lego following the instructions, or you can use the pieces to build your own creations. That’s what we needed to do here! He created a spreadsheet that plotted out the 3×4, 4×4, and 5×5 units, identifying the different pieces. Then we worked out how we could put them together to create a 3×4 (standard instructions), and 2 units that would be 4×5 each. All we would need was one of each size. Perfect!
Then the fireplace wall came down to reveal an absence of alcoves, and we decided to build alcoves instead. All of a sudden my Kallax wall had a different measurement. Blow. We had to sacrifice one cubby of depth, and now I needed units to fit 11 cubbies across instead.
Ok, we can work this out. Adult Lego, remember? Now we needed a 3×4 (standard), a 5×4 and a 5×3. Hmm. Trickier. I worked out that we could build the 5×4 and the 5×3 from a 5×5 and a 3×4 BUT we’d be missing one shelf. I turned to Facebook marketplace, Gumtree, Freecycle, anything I could think of to come up with the missing piece. Happily we got it resolved, and the result is the perfect units for my dream room!
We had a couple more adjustments to make tho. I wanted a wider space for my printer and another one for my Silhouette. I also wanted some taller spaces for a small set of drawers that were my Gran’s, and another taller space for things like grid paper and display boards. Going back to the spreadsheet we worked out how to achieve this by removing some of the smaller shelf pieces. Then when we came to assembly, we had to pay really careful attention to leave out the correct pieces, and not accidentally build it back to front or upside down.
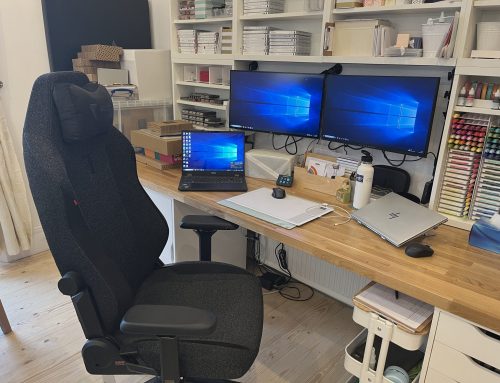
In the end, we managed to get exactly the result we were looking for, and I am SO happy! Can’t wait to show it off to you properly!


Leave A Comment